
If you have been following us on Facebook, you know by now that we now have a FULLY FUNCTIONING AMAZING WOOD-FIRED HOT TUB!!!!!
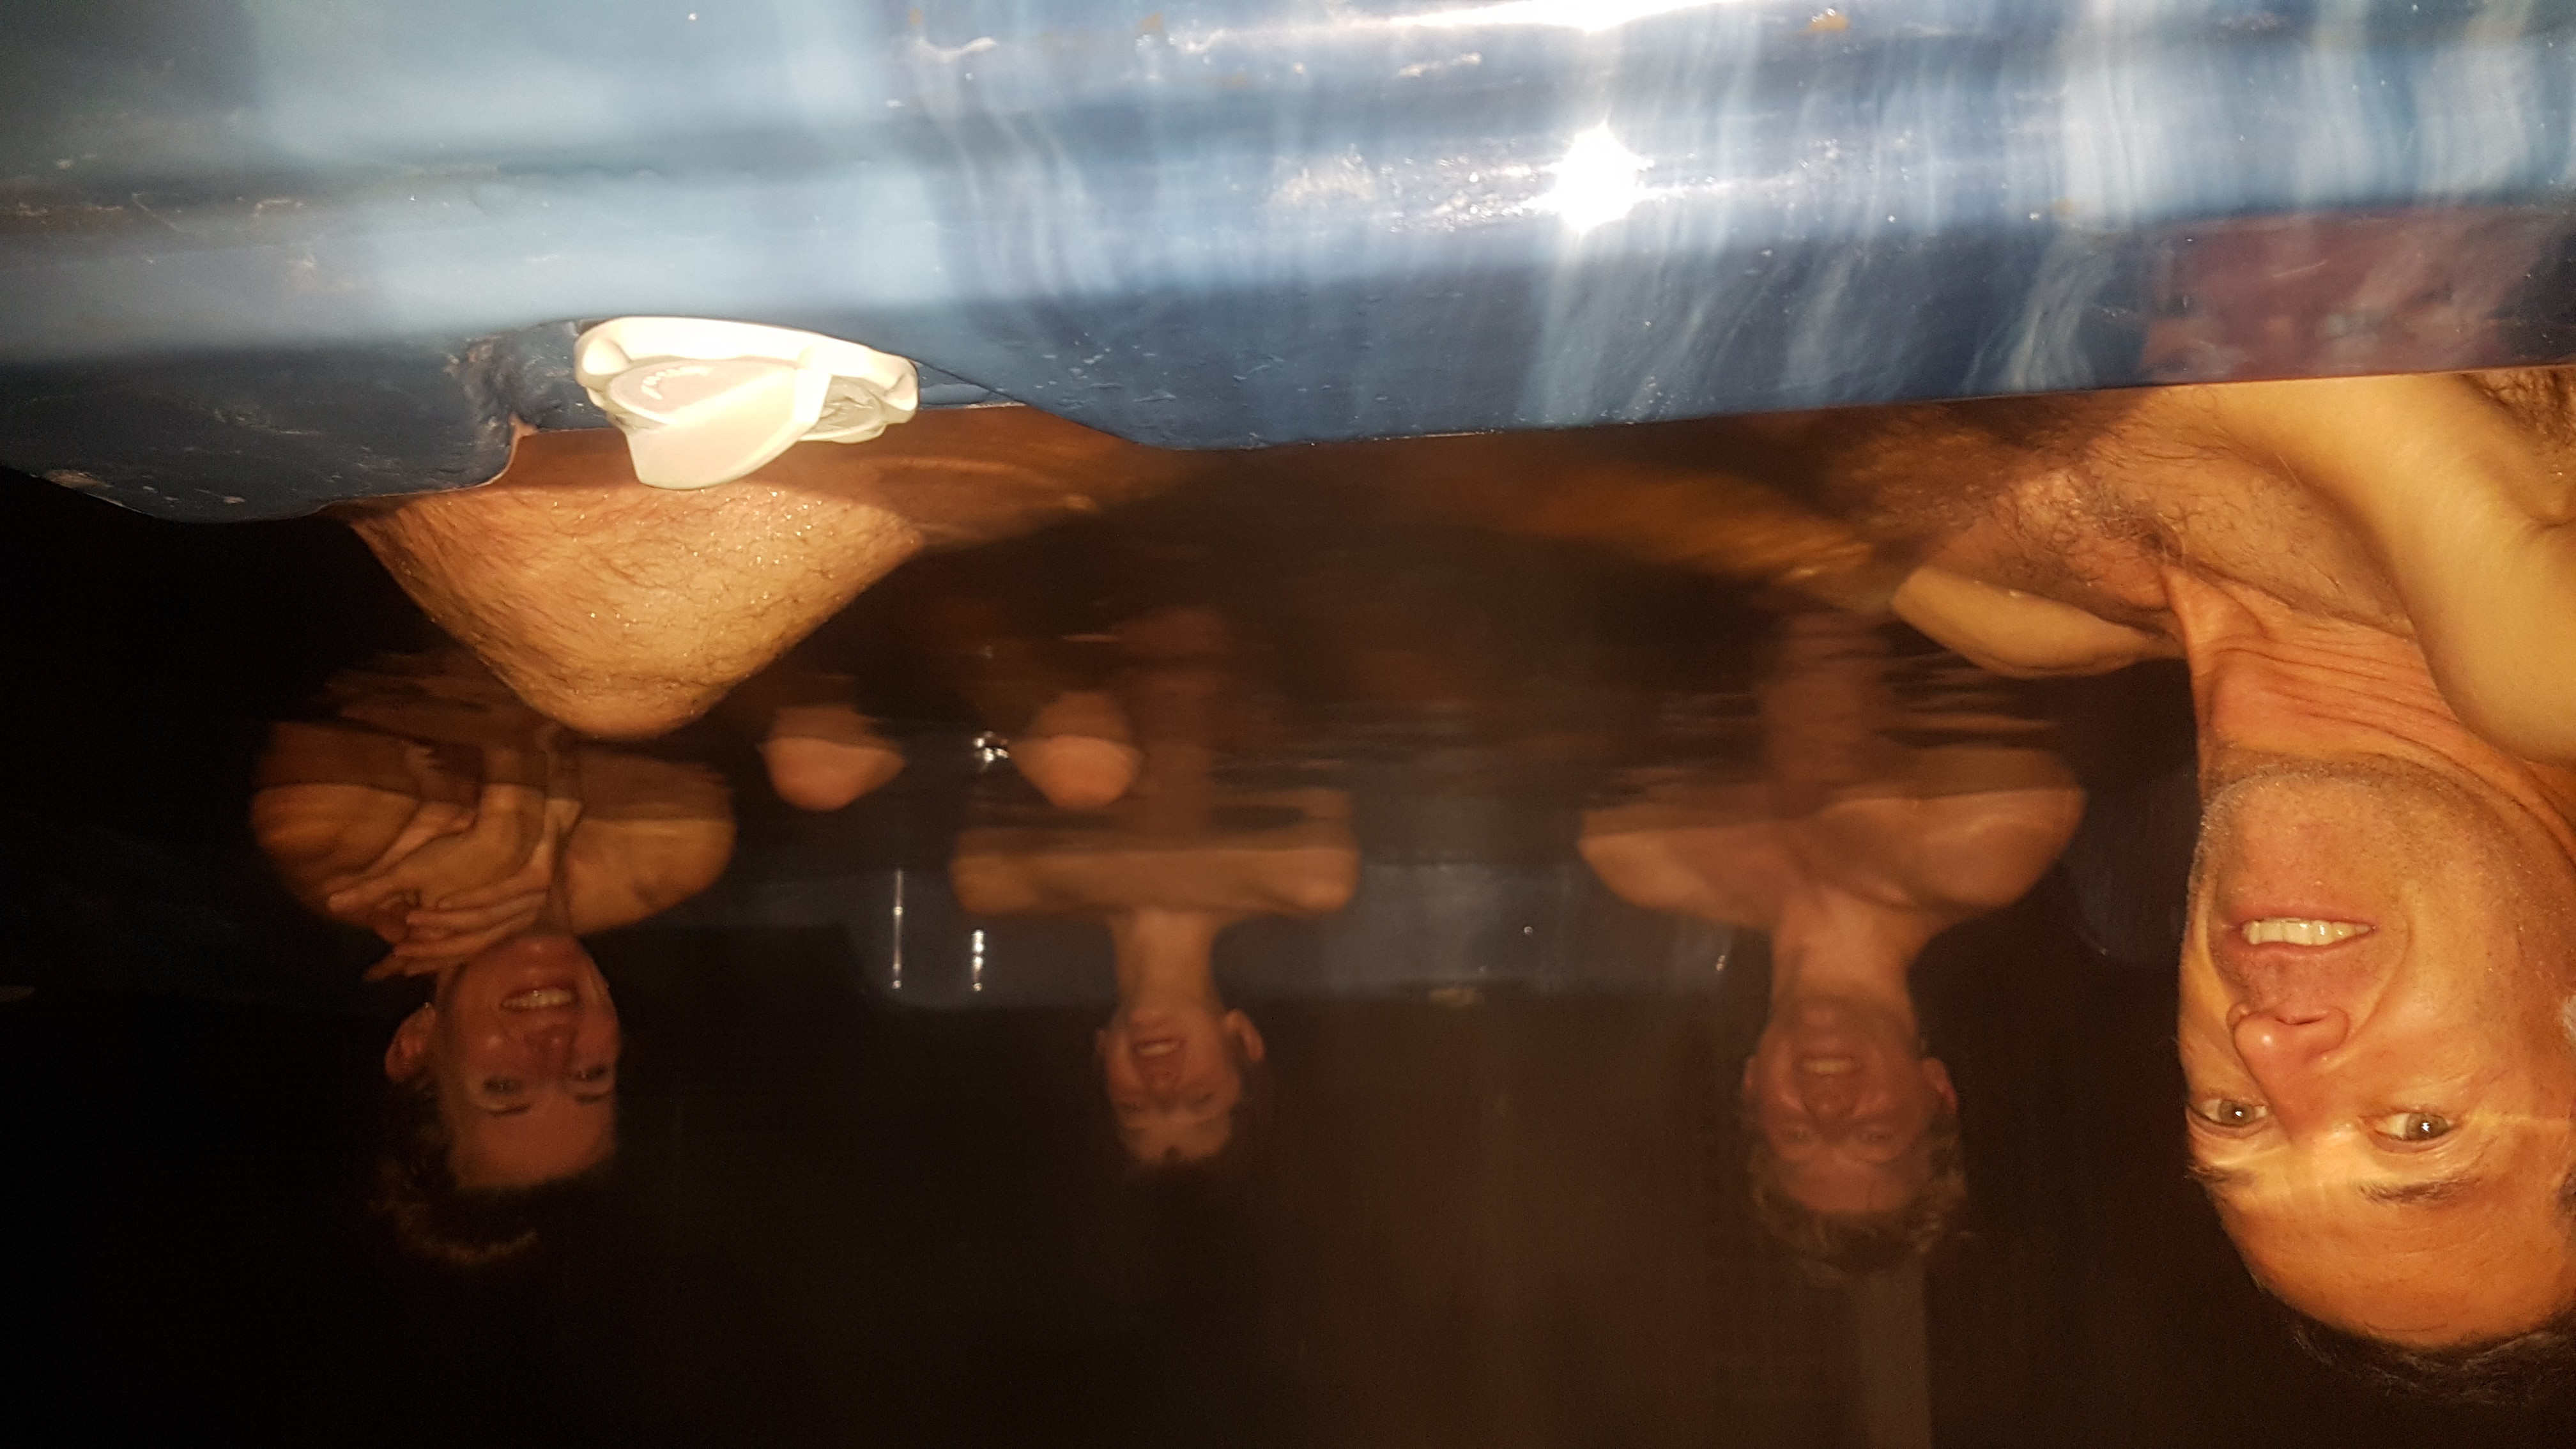
Which deserves a totally candid, unstaged, casual shot of me just casually perched on the edge of our hot tub being totally casual. This is totally how I enjoy the hot tub.
Ok. That was the one and only bikini shot. Enjoy it. (Pete couldn’t find his bikini, and having Slave #2 pose in his Borat mankini would probably see us in trouble with Family Services). Onto the technical specifications.
First, let me say, this is my absolute favourite project we have ever worked on. It is partly because- duh! we get to luxuriate in a hot tub whenever we want!- but it isn’t only that. Anyone with enough money and enough power/electricity can have a hot tub. But we didn’t need to rely on either, and it seems amazing that with our lifestyle, where we need to be so conscious of resources- power, water, fuel- we can have this top end luxury item with fairly minimal guilt.
Additionally, as far as ‘Bang for Buck Ratio’, this project was relatively cheap, relatively quick, and adds immeasurably to our quality of life.
So, to update our last blog post, where we left off pondering why our hot tub was a dismal failure and how we might remedy it…we had three possible solutions:
- to raise the hot tub for a stronger thermosiphon effect,
- to place the heat exchanger in the hottest part of the fire, and
- to replace the heat exchanger completely for a more efficient one.
Hot Tub Fail #2
1. Raising the Hot Tub and Putting the Heat Exchanger in the Hotter Part of Fire
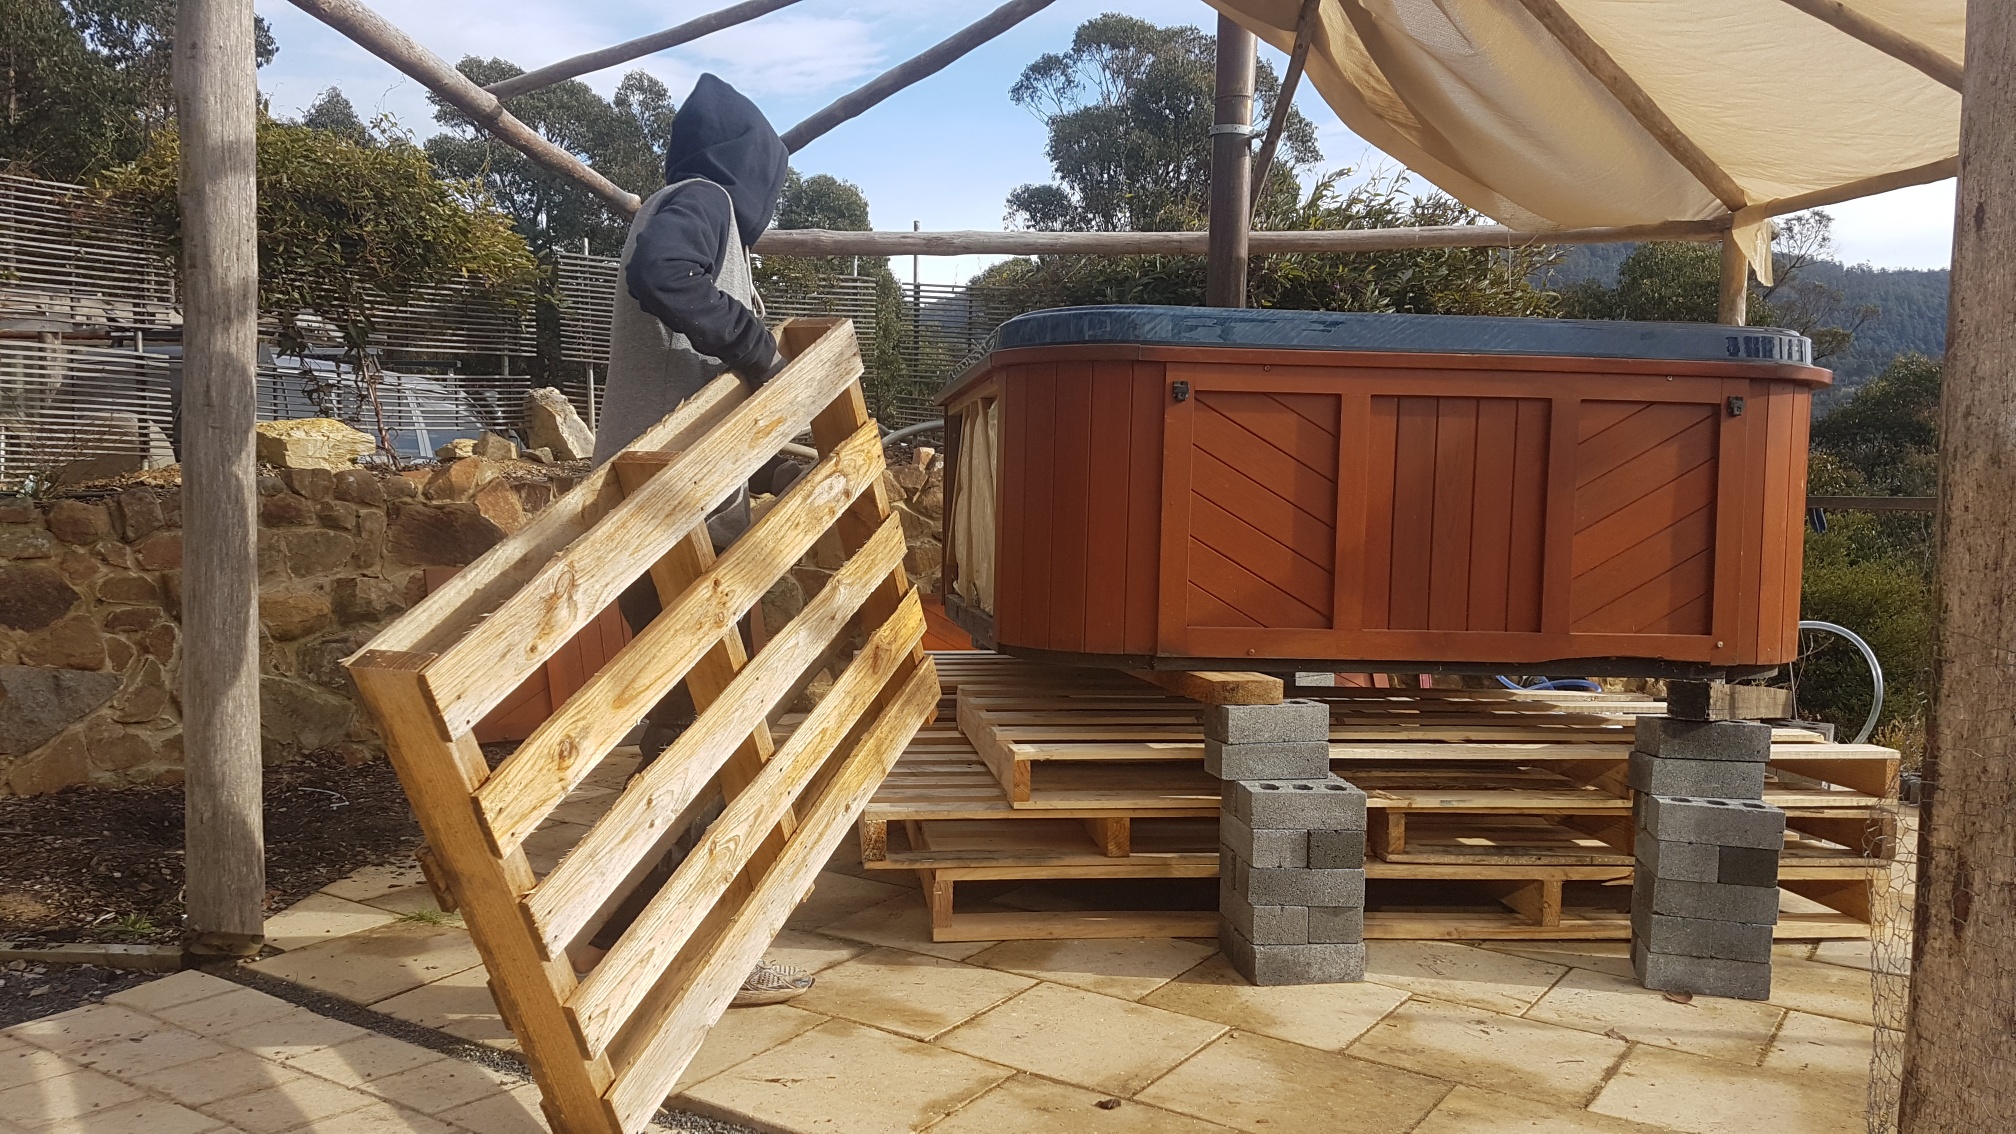
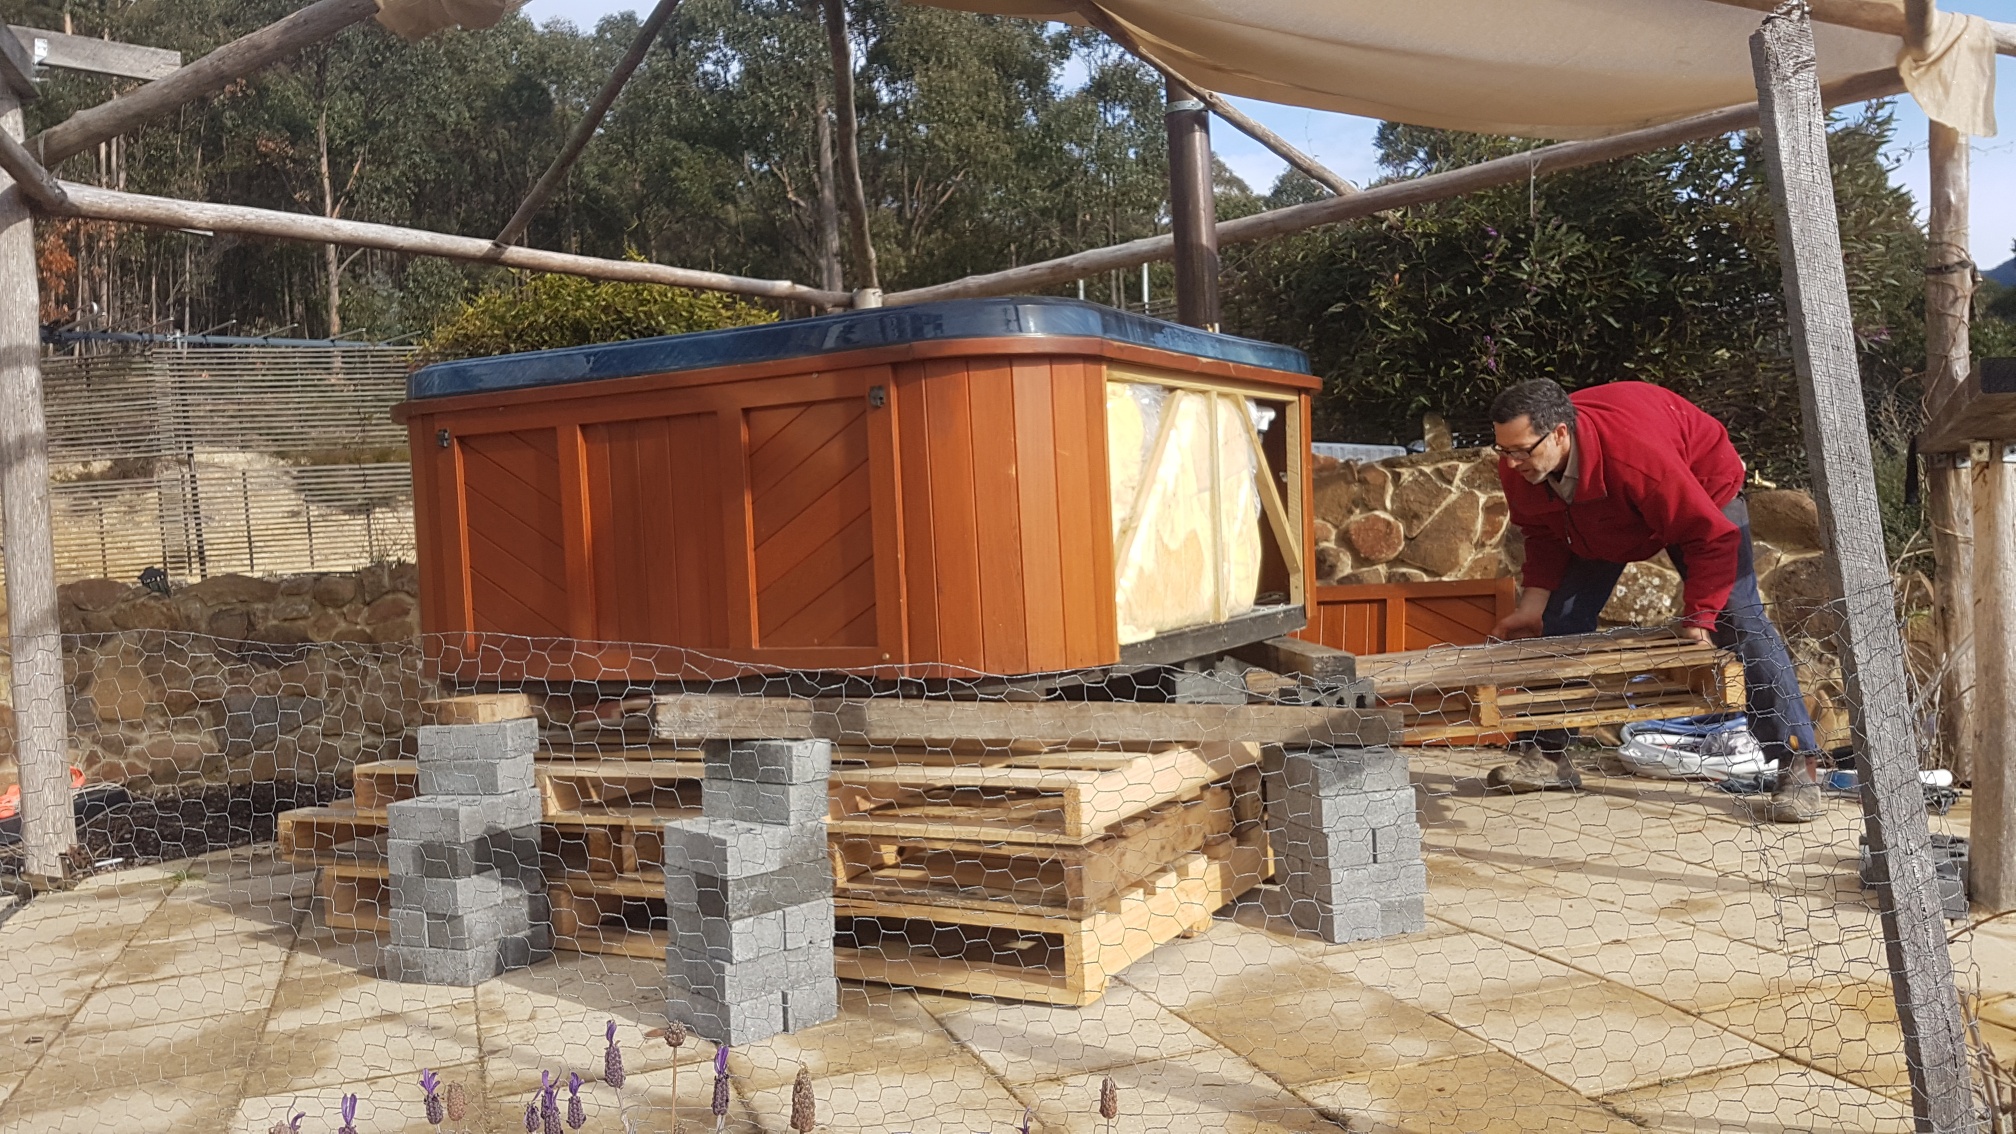
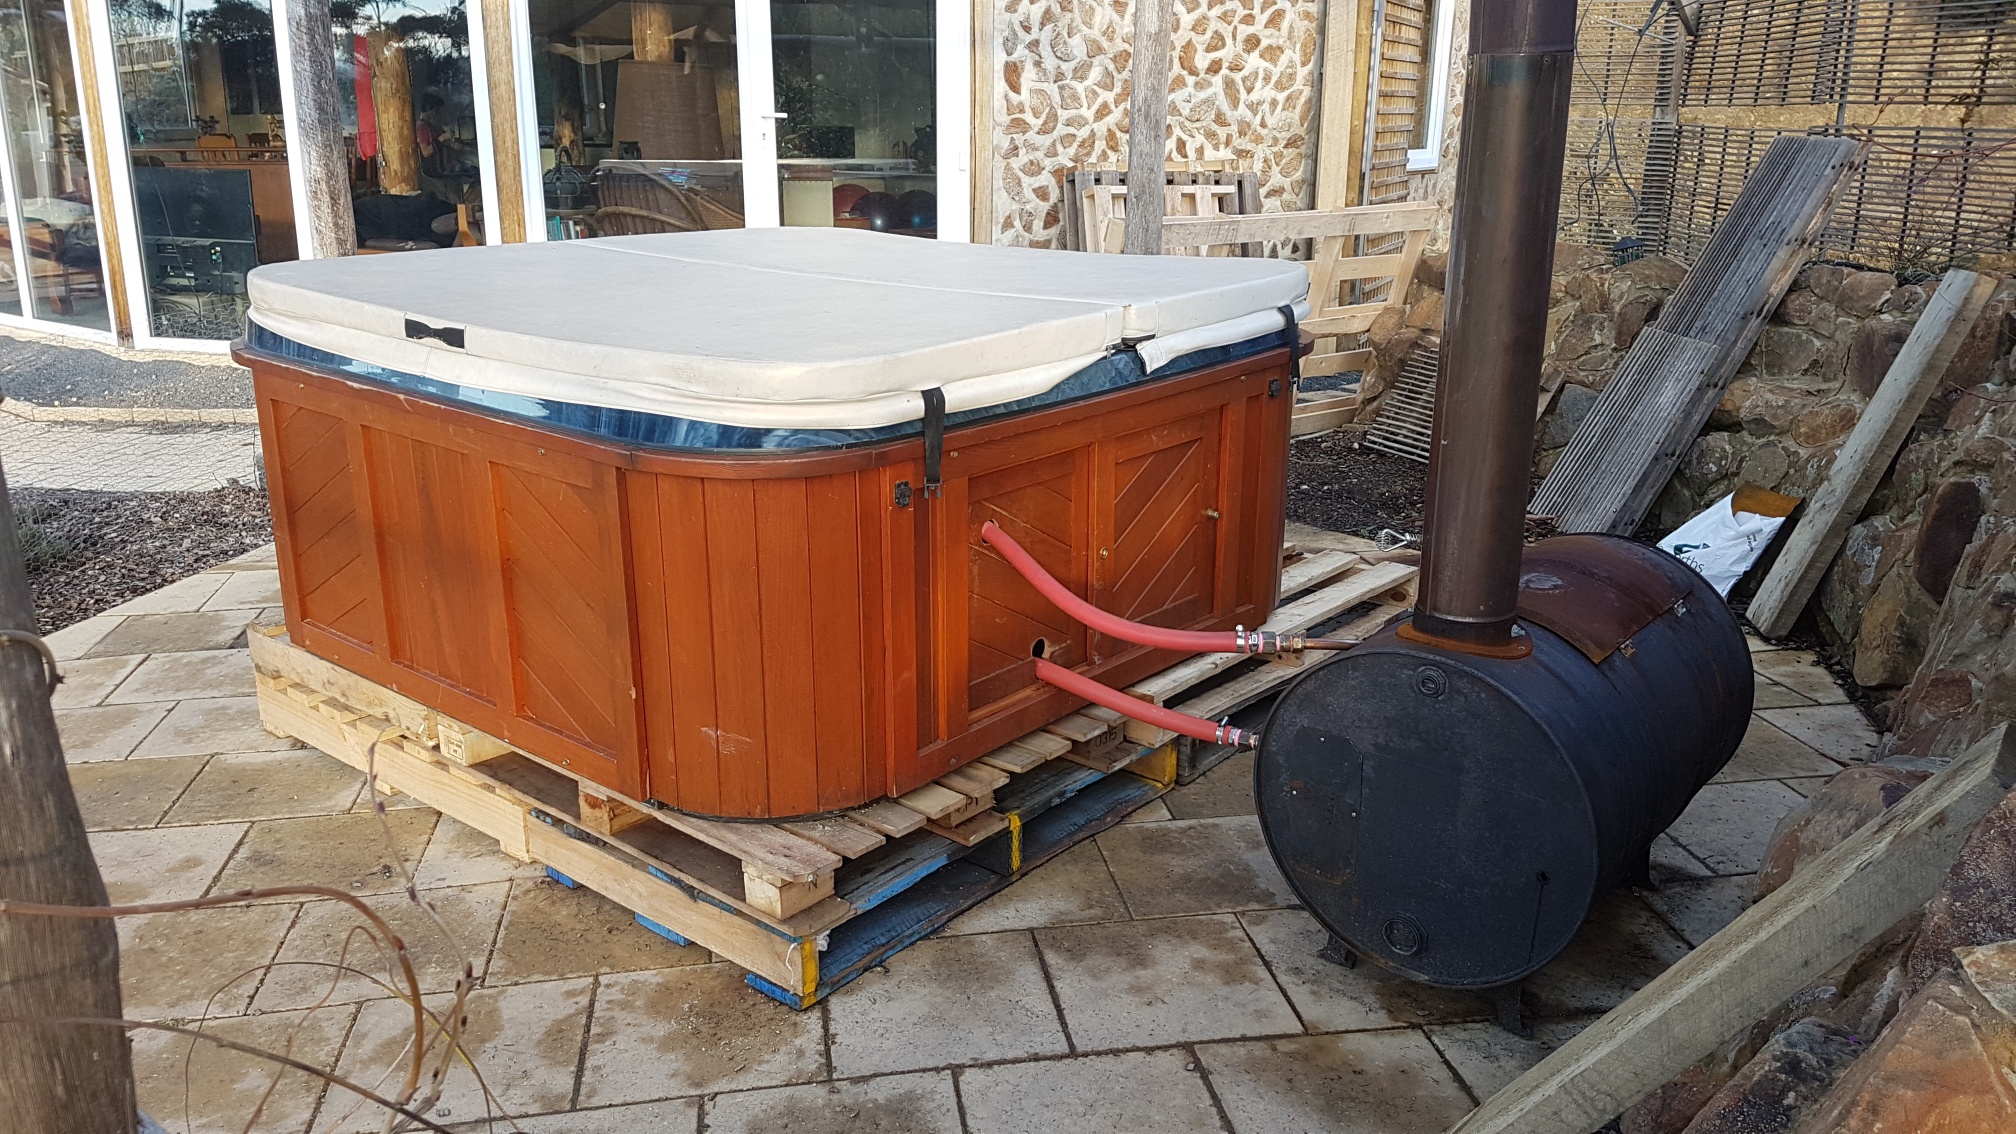
We raised the hot tub so that the bottom of the tub was above the heat exchanger in the barrel stove to create a stronger thermosiphon effect. Raising a 400kg hot tub is no mean feat, and it took Peter and Slave No.2 half a day to raise the tub four pallets high.
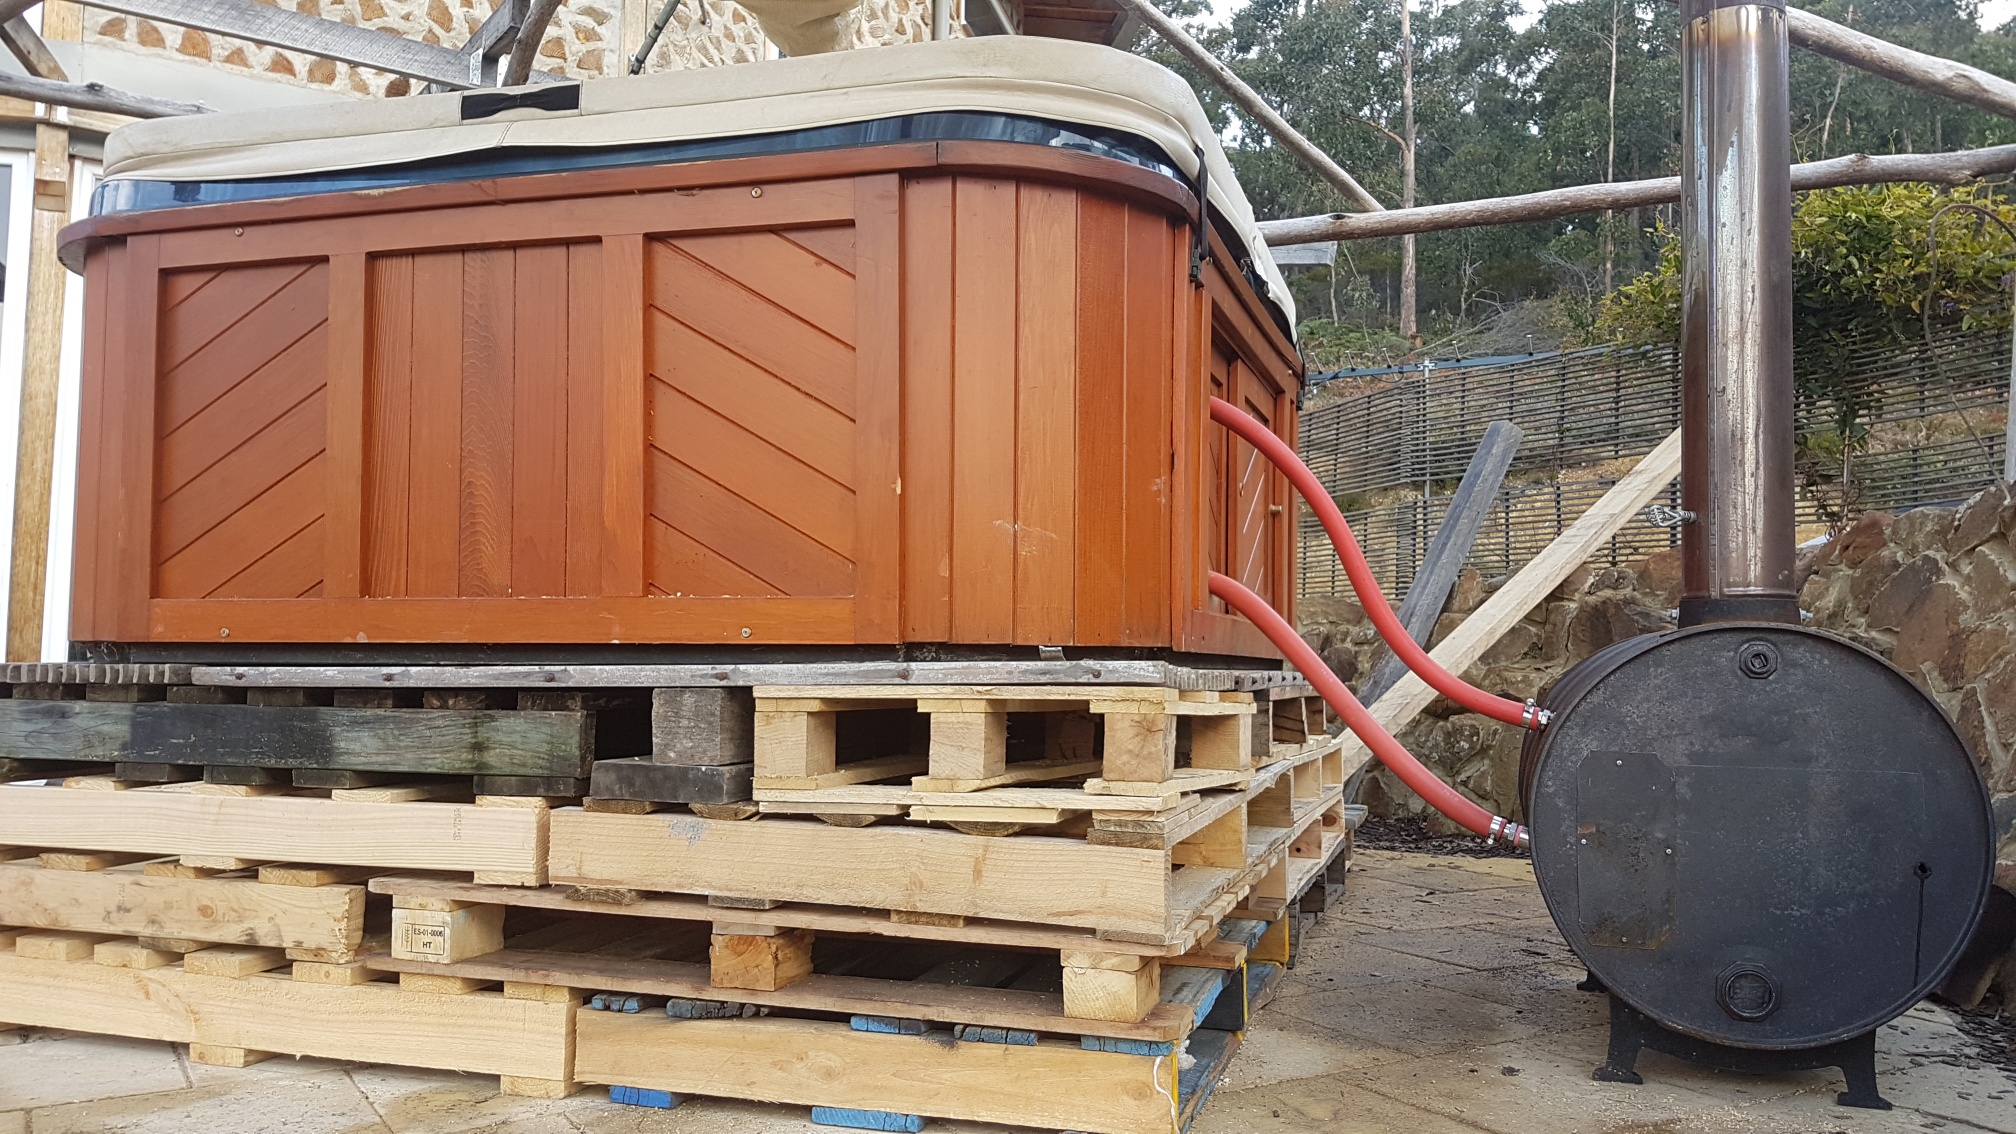
Then, we placed the water jacket on the side of the barrel stove, instead of the back. We thought maybe most of the heat from the fire was going straight up the flue and missing the water jacket.
That night, we lit the fire. 24 hours and more-wood-than-I-want-to-think-about later, the water was still cold.
Hot Tub Failure # 3
2. Replacing the Water Jacket with a More Efficient Heat Exchanger
We suspected our main culprit was the heat exchanger we’d had made by the local metalworker. (Let it be known that Blythe NEVER WANTED TO HAVE THE WATER JACKET MADE IN THE FIRST PLACE and that she WANTED TO TRY A COPPER COIL FROM THE BEGINNING but would never be petty enough to put that information in a blog).
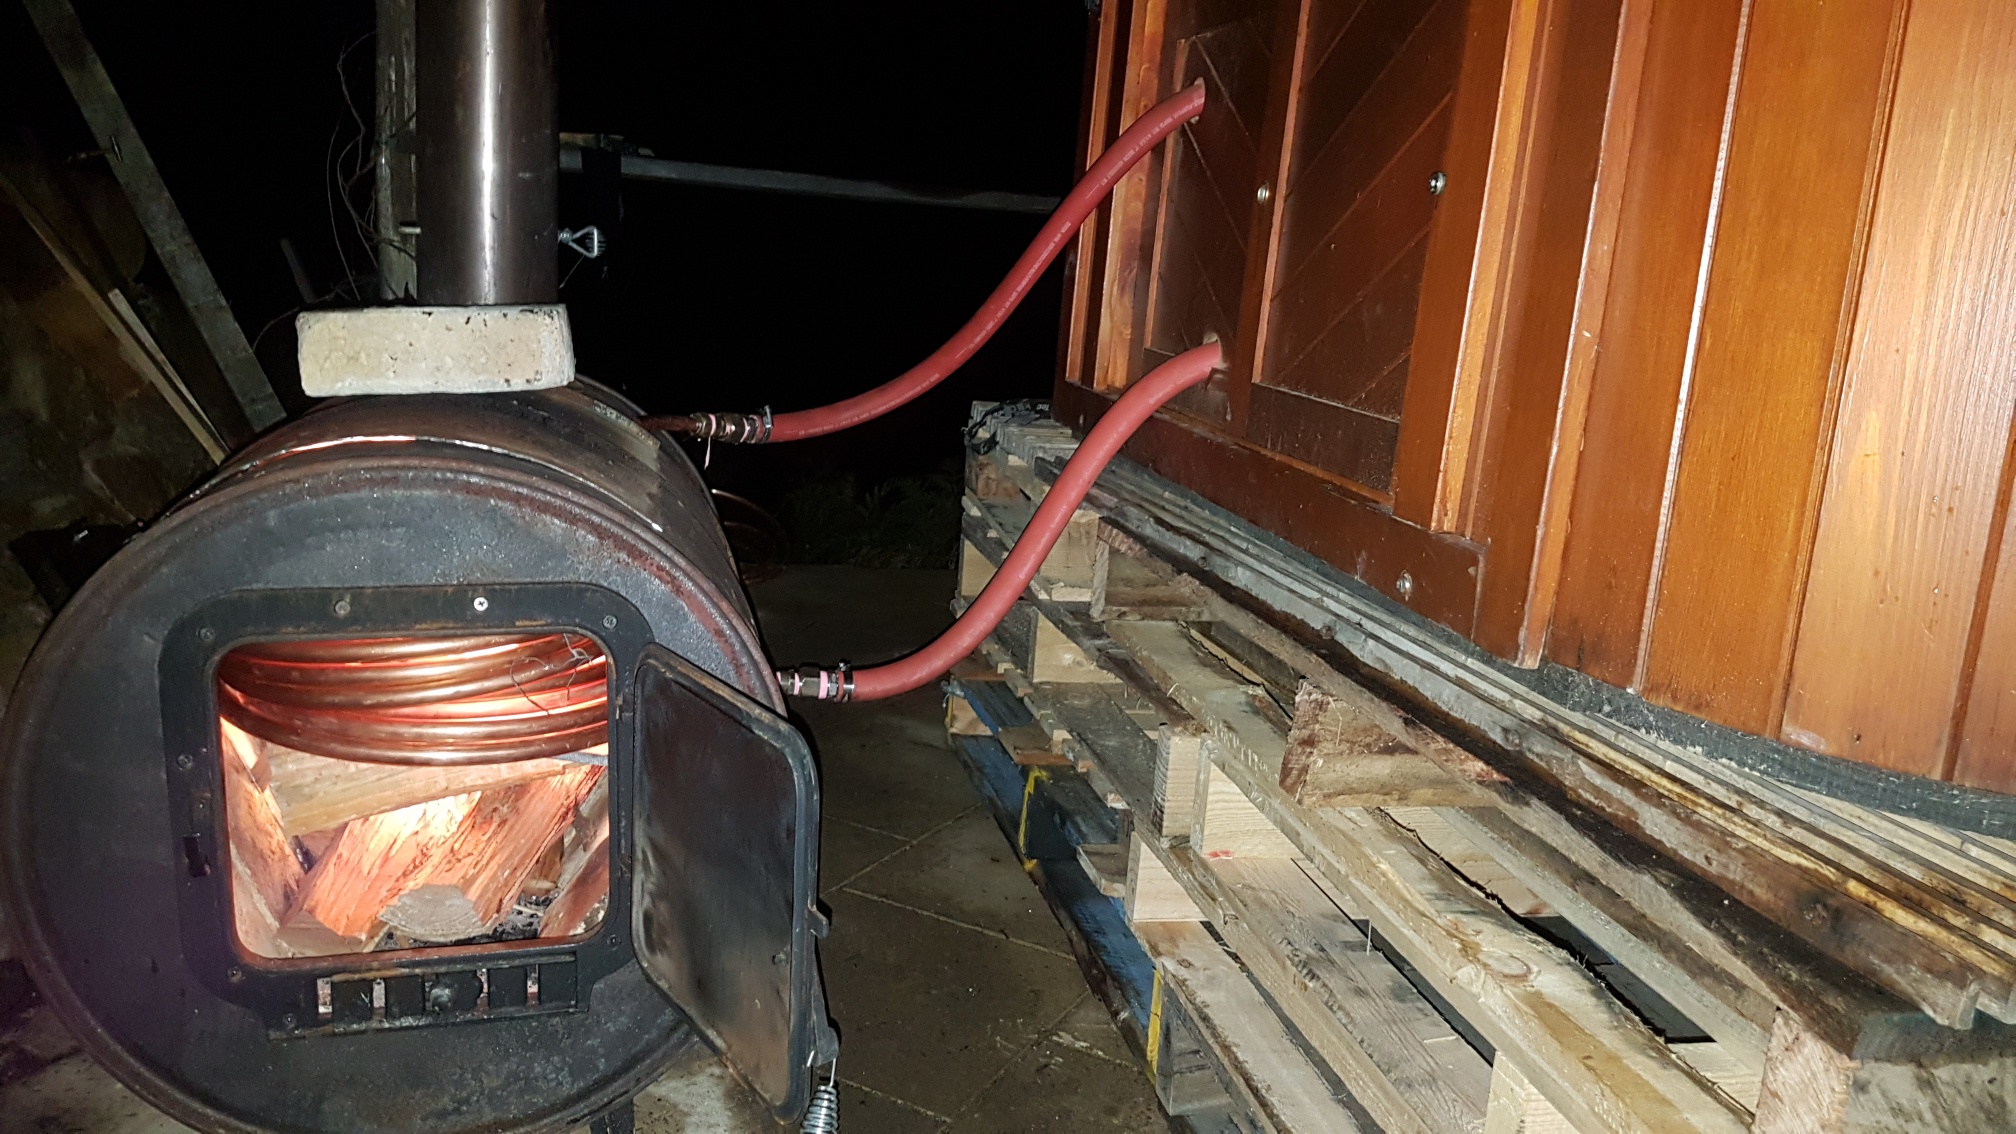
We bought an 18m coil of 3/4″ copper pipe, twisted it into a spiral, and used as much of it as we could fit into our barrel stove. We only needed to remove about a metre or so of the pipe, so our heat exchanger was made of about 16 metres of 3/4″ annealed copper pipe. (We could have used 1″ copper pipe since our fittings to and from the tub are all 1″, but being non-annealed, it would have meant we would have had to heat it to coil it, and that was more trouble than we were willing to take).
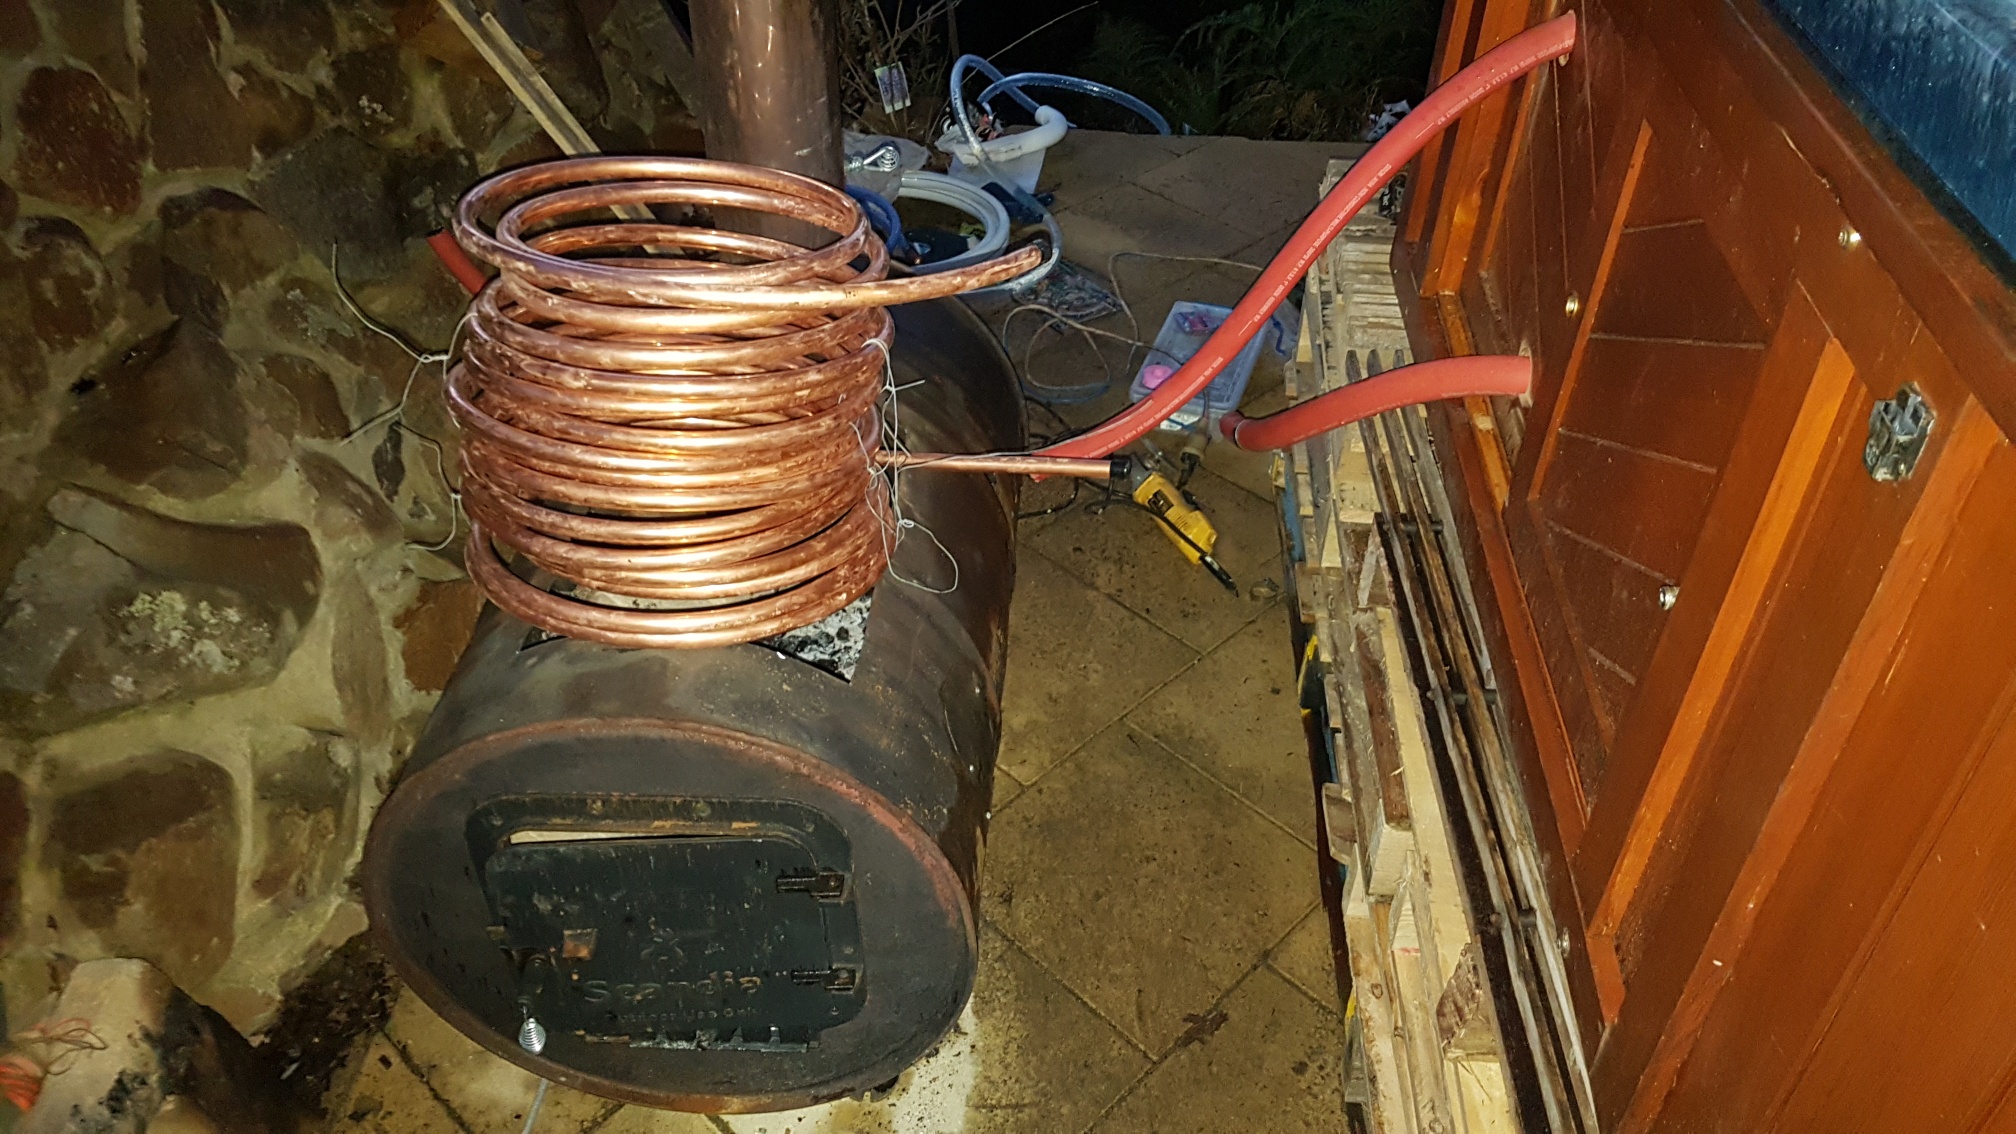
We made sure that we placed this coil in the top half of the barrel stove to best make use of the heat of the fire; the coil was too large to fit through the door of the stove, so we had to cut a dirty big hole in the top of our stove. The coil also took up a lot of room, and we now found we needed to build the fire within the coil instead of underneath it.
We lit a fire with high hopes. The whole system made a LOT of noise, belching and gurgling, which we took to be a positive thing. Looking into the hot tub, for the first time, we could actually see the movement of water coming from inlet in sporadic explosive bursts. In a short while, we knew the heat exchanger was working more efficiently than the water jacket; the water which was coming from the inlet was hot. BUT- it would burp hot water violently out and then go still for a while, and the copper hose leading from the stove to the tub stayed cool near the top, despite being almost too hot to touch along most of its length. It was as though the water from the hot tub was being sucked back down into the hose.
It was horribly disappointing, but six hours later, the hot tub was still not a hot tub, and I refused to waste more wood on it.
Hot Tub Success!!
The failure with the copper coil was a bitter blow. I had been so certain that the copper coil was the answer to our problems! We had implemented all of our possible solutions- raised the tub, replaced the heat exchanger, and placed the heat exchanger in the hottest part of the fire- and STILL no success. We were at a loss as to what to try next.
After stewing and googling for a day and a sleepless night, I came across one sentence on a site about thermosiphon effect: “if there are any bubbles in the system, the thermosiphon effect will not work”. This felt like what was wrong with our system and could explain why our hot water was coming through in such weird bursts. I suggested we take the copper coil out and re-coil it more carefully, making absolutely sure that each spiral was higher than the last. We had coiled it quite hastily, and as can be seen in the below photo, a few of the coils were dipping below the ones below.
In order to fix the coil, we needed to remove some more copper pipe. We had tried to fit too much into the barrel stove and had sacrificed neat, upwardly-spiralling coils in the process. We removed another couple of metres, so the coil still had fourteen or so metres in it.

We lit the fire, and within ten or fifteen minutes, the system was again thumping away like a possum trying to escape from a box. I was disheartened. I had presumed that once we fixed the coil, the system would function soundlessly. I put the jacuzzi cover on the tub and kept stoking the fire, but I was pretty sure we still hadn’t solved the problem. BUT…
Three hours later, the tub was definitely hotter than it had ever been. And later that night, we enjoyed our first, wondrous House That Worked Out Hot Tub Experience.
Hot Tub Modifications
1. Lowering the Hot Tub
The tub was WONDERFUL, but now I wondered if it had been necessary to raise the tub at all and whether the copper coil heat exchanger would work if we put the tub back to its original height. Peter and Slave No.2 were understandably reluctant about this- they had put many hours into raising the tub, and if we lowered the tub and the system didn’t work, we would need to raise it all over again. But there were a couple of issues with our raised tub. Firstly, it was hazardous to get in and out of, and we would need to build quite a big deck for the tub to be safe. Secondly, the height of the tub was now quite a bit higher than our rockwall, and we no longer received any protection from the wind.
Peter suggested that before we go to the trouble of lowering the hot tub, we first do a test by RAISING the much-lighter barrel stove UP to the hot tub. We stacked a few pallets as a platform for the stove, lit the fire, and a couple of hours later, we had our answer: the hot tub still worked, and we could lower both the stove and the tub back down.
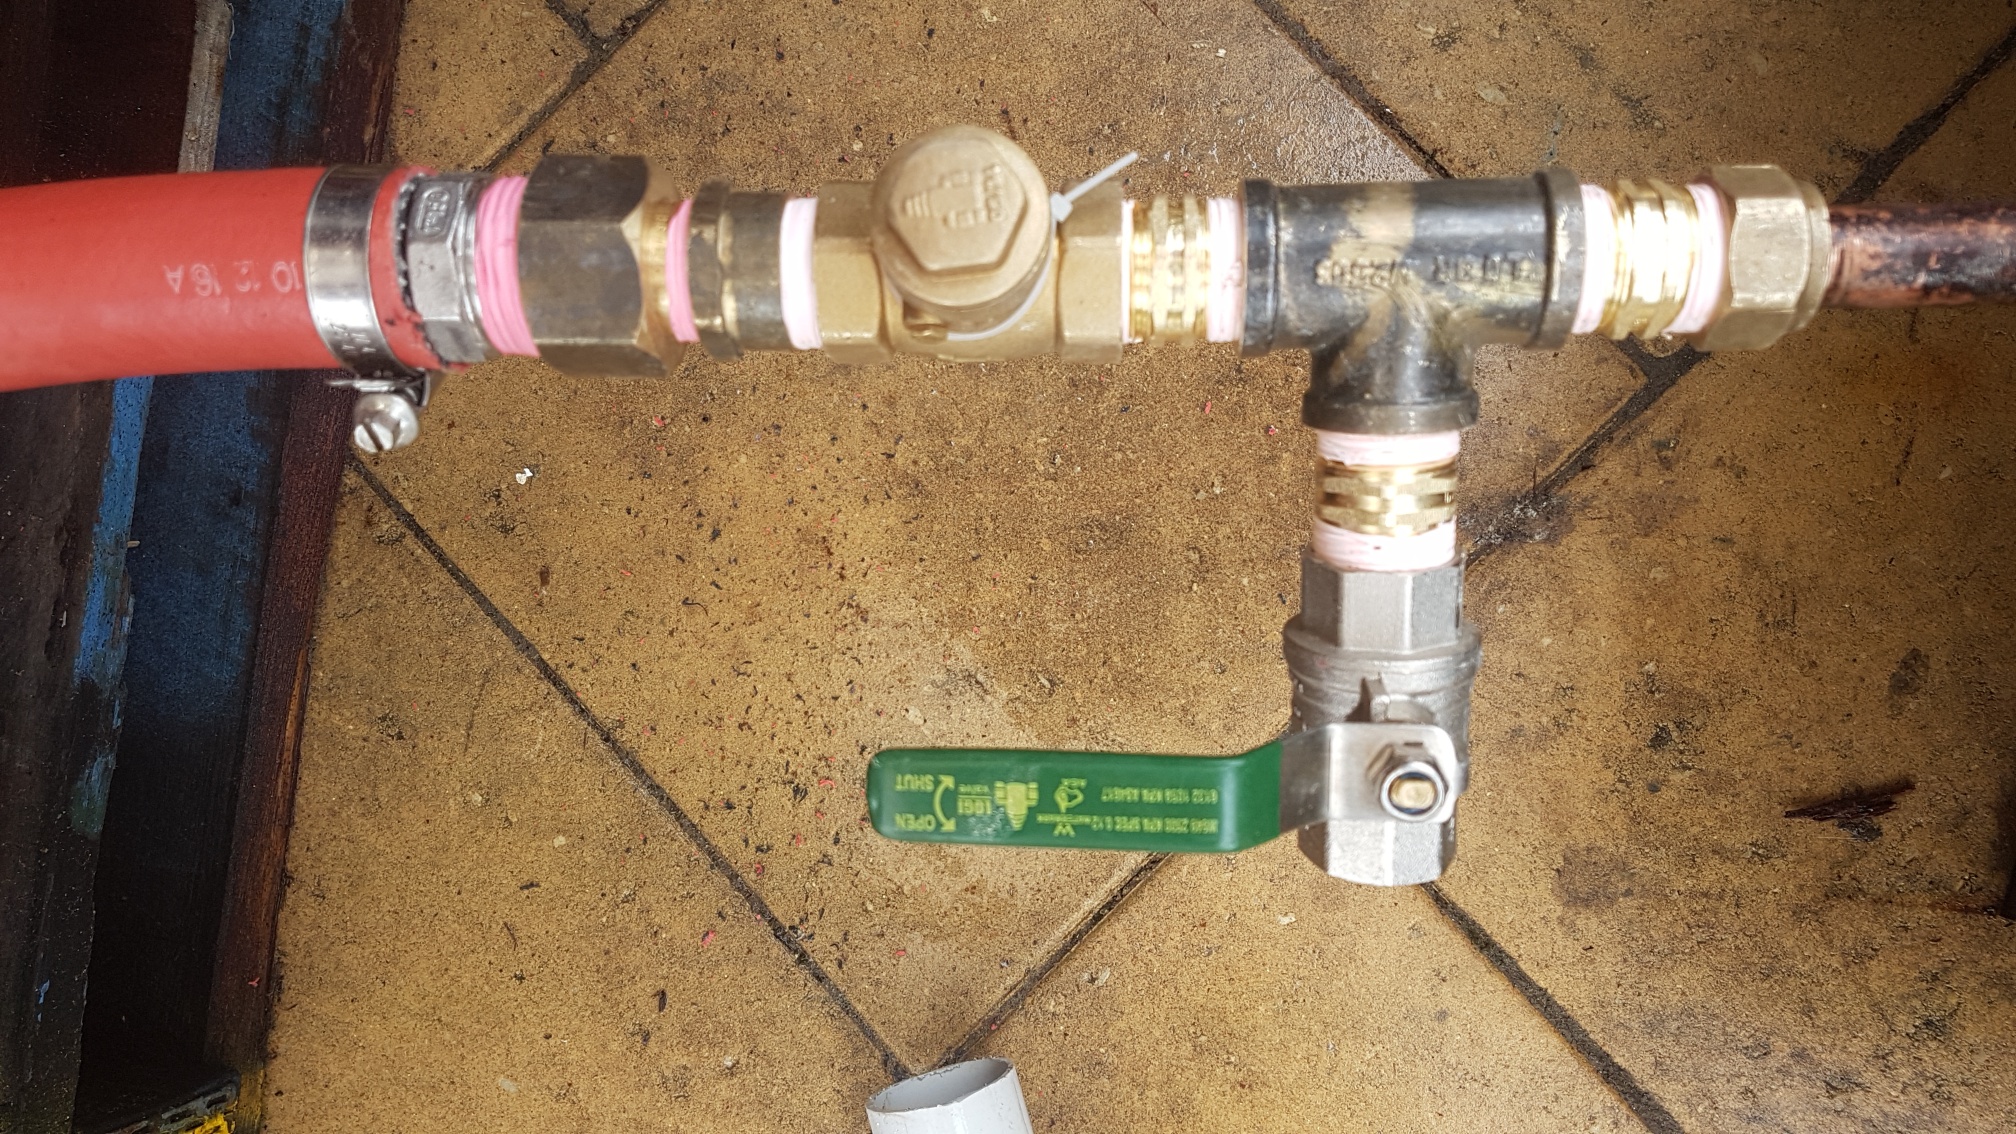
2. Inserting a Tap to Drain the Tub
Since we needed to empty the tub to lower it, we made some other modifications to the empty system. Up to this point, we had been draining the tub by disconnecting the hoses to the stove, but our long term plan was to use a siphon. We decided it would be much quicker to have a tap at the lowest part of the system.
3. Inserting a Swing Check Valve
A very helpful Facebook follower suggested we insert a swing check valve to improve the efficiency of the hot tub. A swing check valve allows water to flow in one direction only, so we hoped this would prevent any flow of water from the tub into the hot water inlet.

Hot Tub Performance
The swing check valve does work, but I had hoped its effects would be more extreme. It had been taking 6 hours to heat up the hot tub from 4ºC to 40ºC. With the swing check valve, it took a little over 5 hours, and I had been hoping it would take no more than three. Here are some measurements using a floating pool thermometer.
11.30am 4º
12.00pm 9º
12.30pm 12º
1.00pm 15º
2.30pm 24º
3.30pm 30º
4.30pm 38º
At one stage, we forgot to put wood in the fire, so these results may not reflect the tub’s best performance. We have noticed that small cuts of wood keep the fire much hotter, so it is possible we can shave this time down by being more conscientious in loading the fire regularly and with smaller pieces.
So, there you have it. The House that Works Out has a Hot Tub!!!! How times have changed from 5 years ago, living with a bucket for a toilet, to now, spending our evenings soaking in a hot tub.
And now for a more realistic hot tub photo:
Awesome guys, well done. Our hot tub runs by LPG gas. Love it. ??❤️?
Oooo, didn’t know you had a hot tub! Nice!!
Love love love love…
What an amazing story… I love your ingenuity, your commitment…. well pretty much everything about you…
Great work!!!!
What a lovely comment, Pedro/Chris. We are seriously living the dream.
Good Morn Builders, Great to see you got that tub cranking! Plumbing looks good, the drain is in a great place. In that position you are able clear any debris that may have accumulated on the swing check valve seat.You’ll know if it’s fouled if the check valve feels warm early in the firing. Not sure if I mentioned before that you should be able to grasp it and feel cool temp when it’s working early on. If you open and shut the drain valve continuously at an Andantino pace, closing it with a quick action, pressure waves occur in the line and pulse the check valve flap open and shut. You’ll hear it slapping on the valve seat. Hot tubs are awesome! I’m still messing with the rocket stove shower. Cheers!
Hi, Ian!!! Yes, the swing check valve is always cool at the start, but I tell you, the tub makes a real racket! Thanks so much for all your suggestions. I can’t believe we got it working. We looooooove it. Thanks so much for your suggestions, much appreciated. How is the rocket shower going? We have a rocket mass heater in the cabin.